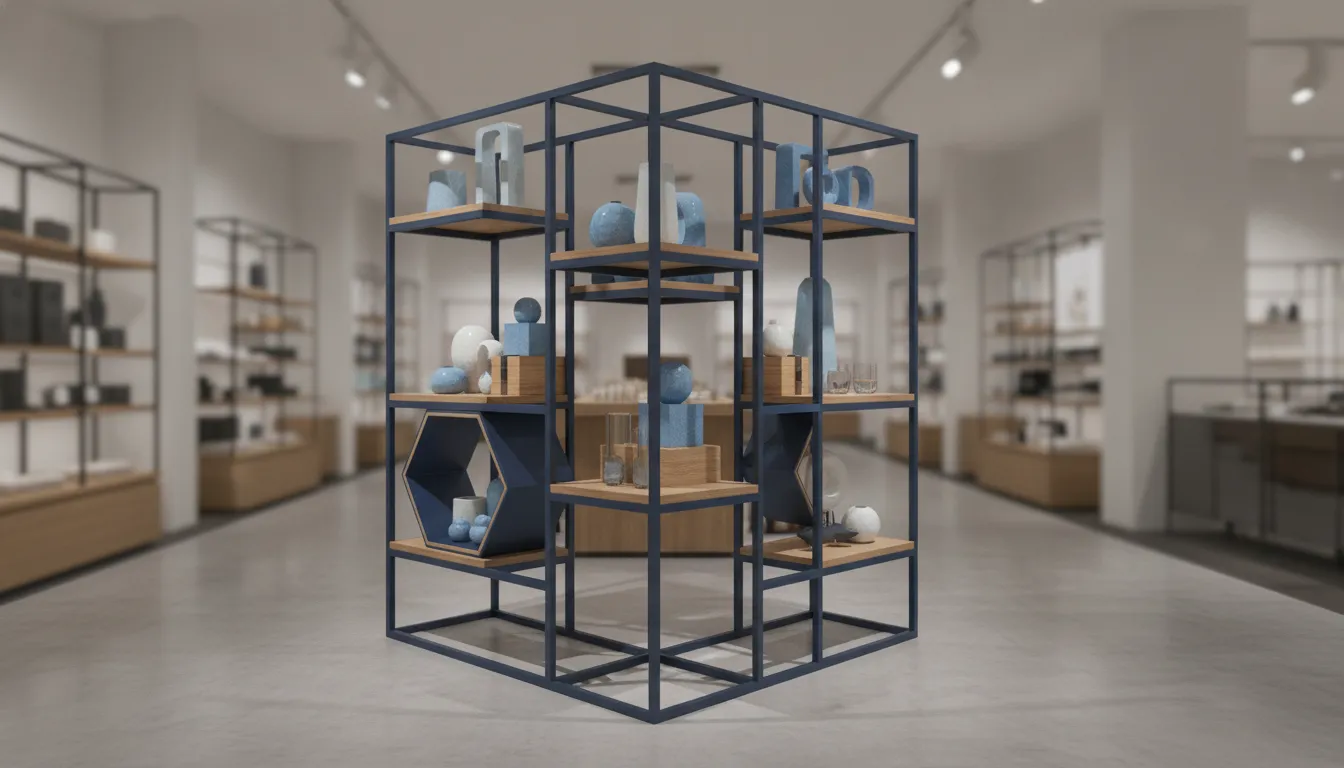


A retail display stand is a small footprint decision with store-wide consequences. Height affects sightlines, base dimensions influence traffic, and the way merchandise is loaded determines whether employees can replenish it efficiently. Choosing the unit by appearance alone can create an attractive fixture that is difficult to stock, move, or repeat across locations.
Explore custom retail fixture solutions with S-CUBE.
Quick answer: Retail display stands are freestanding or surface-positioned units that present merchandise in a defined area. Select one by matching its format, material, height, footprint, load capacity, access pattern, stability, mobility, and campaign duration to the job it must perform.
This guide focuses on the selection mechanics for one stand at a time. It is different from a whole-store layout plan or a broad display-rack overview. Use it when a procurement, store planning, or visual merchandising team needs to specify a single unit for a featured collection. Checkout zone, perimeter location, seasonal program, or repeatable multi-location rollout.
The best stand type is determined by the merchandising task, not by a generic preference for floor or counter placement. Define where the unit will sit, how shoppers will approach it, how employees will service it, and how long the program will run. Those four inputs narrow the choice before dimensions and finishes are discussed.
Floor-standing units create vertical presence and give a product line a defined destination within the selling area. They can support a focused assortment, organize a specialty category, or present a brand story away from the perimeter. Because customers may approach from more than one direction, review the footprint, exposed edges, sightlines, and base stability together. A single floor stand should complement the broader floor plan rather than become an obstacle in it.
Countertop stands use existing horizontal space for smaller assortments, add-on products, or merchandise that benefits from close inspection. A checkout counter, service desk, or fitting-area surface may be appropriate, provided the unit does not obstruct transaction equipment, employee work areas, or customer access. Confirm the weight of the stand and its merchandise together. A top-heavy unit can be unstable even when the counter itself is sturdy.
Rotating stands can expose multiple product faces from a compact footprint. They work best when customers need to browse a varied selection from one position and the turning radius will not narrow a circulation route. Hybrid stands combine shelves, hooks, bins, headers, or other presentation methods when one product family has different package sizes. Both formats require a check of balance, reach, replenishment access, and the space needed to operate the moving components.
Point-of-purchase stands support a decision point, such as checkout or an adjacent queue. Promotional and temporary units may support a seasonal launch, event, or limited campaign, so their construction, storage, deployment, and removal requirements deserve early attention. A short-term stand should not be specified as though it were a permanent category fixture. S-CUBE offers both Retail Ready and custom options, allowing the format to align with the rollout horizon.
Material selection should begin with merchandise weight, customer handling, cleaning frequency, and finish expectations. It should also account for the structural work the unit must perform. Wood, metal, acrylic, glass, laminates, and mixed media can all be appropriate, but no material is automatically the best choice for every retail environment. The strongest specification pairs a visible finish with an internal construction suited to the load and operating routine.
| Material | Useful strengths | Evaluate before specifying |
|---|---|---|
| Wood and laminates | Warm, substantial surfaces for beauty, specialty, apparel, and lifestyle presentations. | Finish durability, edge protection, cleaning routine, and repeatability across stores. |
| Metal | Structural support for heavier products, shelves, hooks, frames, and demanding applications. | Coating, touch points, corrosion exposure, and how the finish fits the brand environment. |
| Acrylic | Clear, lightweight presentation that keeps smaller products visible. | Scratch visibility, cleaning methods, fasteners, and product security. |
| Glass | Transparent, elevated presentation for merchandise where visibility is central. | Handling, edge treatment, breakage risk, cleaning, and installation requirements. |
| Mixed media | Combines a durable structure with selected branded or transparent surfaces. | Seams, transitions, component replacement, and consistency in repeat production. |
Wood-based construction can make a stand feel crafted and approachable, but the finish must tolerate the traffic and maintenance routine. Metal may carry greater structural demands, while acrylic can preserve a clear sightline around compact products. Glass may elevate presentation when its handling and safety requirements are addressed. These are application tradeoffs, not universal performance ratings.
Mixed media often resolves competing needs. A retailer might use a metal frame for support, laminate panels for brand warmth, and transparent components for product visibility. S-CUBE's manufacturing capabilities include wood, metal, acrylic, glass, wire, plastic, and mixed-medium combinations. Its custom retail fixture program can evaluate the stand as a complete merchandising system rather than as a finish sample alone.
Include lifecycle questions in the specification. Can employees clean each surface without damaging it? Will exposed edges show wear? Can a shelf, panel, or fastener be replaced without rebuilding the unit? For a repeated program, can the selected finish be reproduced consistently? S-CUBE's design and engineering services can help test material and construction decisions before production.
The right size for retail display stands is the smallest footprint that supports the merchandise, shopper interaction, and employee workflow without harming visibility or circulation. Start with the real merchandising zone, not a catalog dimension. Measure the proposed location, nearby fixtures, approach paths, storage access, and the space needed for a customer to pause and browse.
Height determines what shoppers notice first and which products are easiest to examine. Use vertical space when the assortment benefits from category visibility or additional product faces. Use a lower profile when the unit sits in an open floor area and cross-store sightlines matter. In either case, keep priority merchandise within a practical viewing and reaching zone. A display that attracts attention but forces awkward reaching may create a poor customer and employee experience.
Consider the full interaction, not only the front elevation. Can a shopper reach a product without leaning across another item? Is the key product information visible at the decision point? Can an employee restock without repeatedly lifting heavy products from floor level or above a comfortable reach? Note the shelf, hook, bin, and header positions in the drawing so the final unit reflects the actual use case.
Measure the footprint in its operating context. A unit that fits on a plan can still interrupt traffic near a doorway, queue, aisle intersection, or high-volume display. Leave room for approach, turning, browsing, carrying merchandise past the stand, and routine cleaning. If the stand rotates, rolls, opens, or has an extended component, measure that operating envelope too.
Size for repeatability when multiple stores are involved. Document the outside dimensions, merchandising height, shelf positions, access points, loading pattern, and replenishment method. Store conditions may vary, so record which dimensions are fixed and which can be adapted. S-CUBE can align a stand with the store architecture and rollout requirements through its custom retail fixtures program. A well-sized unit supports the product, customer path, and operating model together.
Stability comes from the relationship between the base, height, footprint, material, and merchandise load. A stand should remain steady during normal customer contact and employee replenishment, including the moments when inventory is concentrated on one shelf or one side. Review the loaded condition, not only an empty rendering. A unit that appears balanced without merchandise can behave differently after installation.
List the heaviest products, their quantities, and their intended positions. Distribute dense merchandise across the unit rather than placing it high or at an outer edge. Confirm shelf, hook, bin, and frame requirements with the manufacturer. Load capacity should be treated as a design input, not estimated from the appearance of a similar fixture. Include accessories, signage, lighting, and any security components in the review.
Anchoring may be appropriate for a tall, narrow, heavily loaded, or frequently contacted display, particularly near a busy path. The correct method depends on the floor, building, fixture construction, and site requirements. It is a site-specific engineering decision, not a universal hardware recommendation. If the display must move, lockable casters may balance repositioning with a stable selling position. Confirm that the loaded unit remains stable. Make sure employees understand how the locks work.
Usability includes stocking, cleaning, inspection, and component replacement. Keep routine handling within practical zones and avoid requiring repeated overhead work or deep reaches. Protect exposed corners, choose finishes that tolerate contact, and make shelves and access points easy to wipe. The operating instructions should cover the actual materials and hardware rather than rely on a generic cleaning note.
Build a simple inspection into store routines. Teams can check for rocking, loose fasteners, shifted shelves, damaged edges, caster problems, and unusual product loading. For a multi-location program, document the approved loading pattern and inspection points so each store maintains the same standard. A sound structure, sensible merchandising, and repeatable maintenance keep retail display stands dependable throughout a rollout.
Choose mobile retail display stands when the merchandising zone changes on a planned schedule and employees have a clear, safe method for repositioning the unit. Choose fixed stands when stability, consistent placement, and permanent category presentation matter more than flexibility. The decision should follow the operating model, not a general assumption that casters are always an upgrade.
Casters can support seasonal resets, in-store events, or changing promotional zones. Before specifying them, map the route the stand will travel. Check doorways, floor transitions, aisle widths, storage areas, and the places where employees will replenish it. A stand that moves easily in an empty showroom may be difficult to maneuver when fully loaded. Define whether staff will move it daily, during campaign changeovers, or only for maintenance.
Fixed retail display stands are often better for a permanent category, a perimeter location, or a unit that helps establish a reliable customer route. Fixed placement can reduce unintended movement in high-traffic areas and make the intended experience easier to reproduce across stores. Keep the unit outside required circulation routes, preserve access to adjacent merchandise, and verify the footprint against the actual architecture.
If mobility is selected, confirm the brake or locking method, floor compatibility, loaded stability, and responsibility for moving the fixture. The goal is controlled mobility, not a display that shifts when touched. A defined retail fixture logistics plan can coordinate delivery, placement, staging, and repeatability across a rollout.
Use this checklist before approving a single unit or standardizing it across locations. It keeps visual goals connected to product requirements, store conditions, employee work, and rollout execution.
For larger programs, a coordinated project team can connect design approval, manufacturing, warehousing, and direct-to-store delivery. S-CUBE supports programs from pilot stores through 500-plus location rollouts, with design, engineering, manufacturing, quality control, and logistics services available according to the program requirements.
Choose based on placement, product access, and campaign duration. A floor-standing unit suits a featured collection with a dedicated selling-area presence. A countertop unit works where close-range access is available. A rotating or hybrid stand can help when shoppers need to browse multiple faces or package formats. For a short campaign, a temporary POP unit may be more practical than a permanent fixture.
Choose the material combination that fits the product load, customer handling, cleaning routine, finish expectations, and brand environment. Metal can support demanding structural applications, wood and laminates can provide warmth, and acrylic can preserve clear sightlines. Glass may suit an elevated transparent presentation when handling and safety requirements are addressed. Mixed media can combine these functions in one unit.
Measure the real merchandising zone and define the product, sightline, customer-path, and employee-access requirements before selecting dimensions. Account for the unit's full operating envelope, including doors, rotation, casters, approach space, nearby fixtures, and replenishment access. The goal is a footprint that supports the merchandise without obstructing circulation or creating awkward service work.
Stable retail display stands use a base, height, footprint, and load distribution suited to the intended merchandise and site. Review the loaded condition, keep dense products low when appropriate, and decide whether anchoring or locking casters are needed. Confirm the design with the fixture manufacturer and give store teams clear loading, movement, and inspection instructions.
Use mobility when the store has planned resets and a safe route for repositioning. Use a fixed base when the unit defines a permanent zone or needs consistent placement. A custom design is useful when standard dimensions, materials, access, load, or brand requirements do not fit the store job. Start with the selection checklist, then determine whether Retail Ready or custom construction is appropriate.
A well-specified stand can improve product visibility while making customer access, employee replenishment, and multi-location consistency easier to manage. Bring your product requirements, proposed footprint, load expectations, material preferences, and mobility needs to the next design discussion. Explore custom retail fixture solutions from S-CUBE Fixtures for a single unit or a scalable rollout program.
Subscribe for expert insights on fixture design, materials, and modern retail environments.