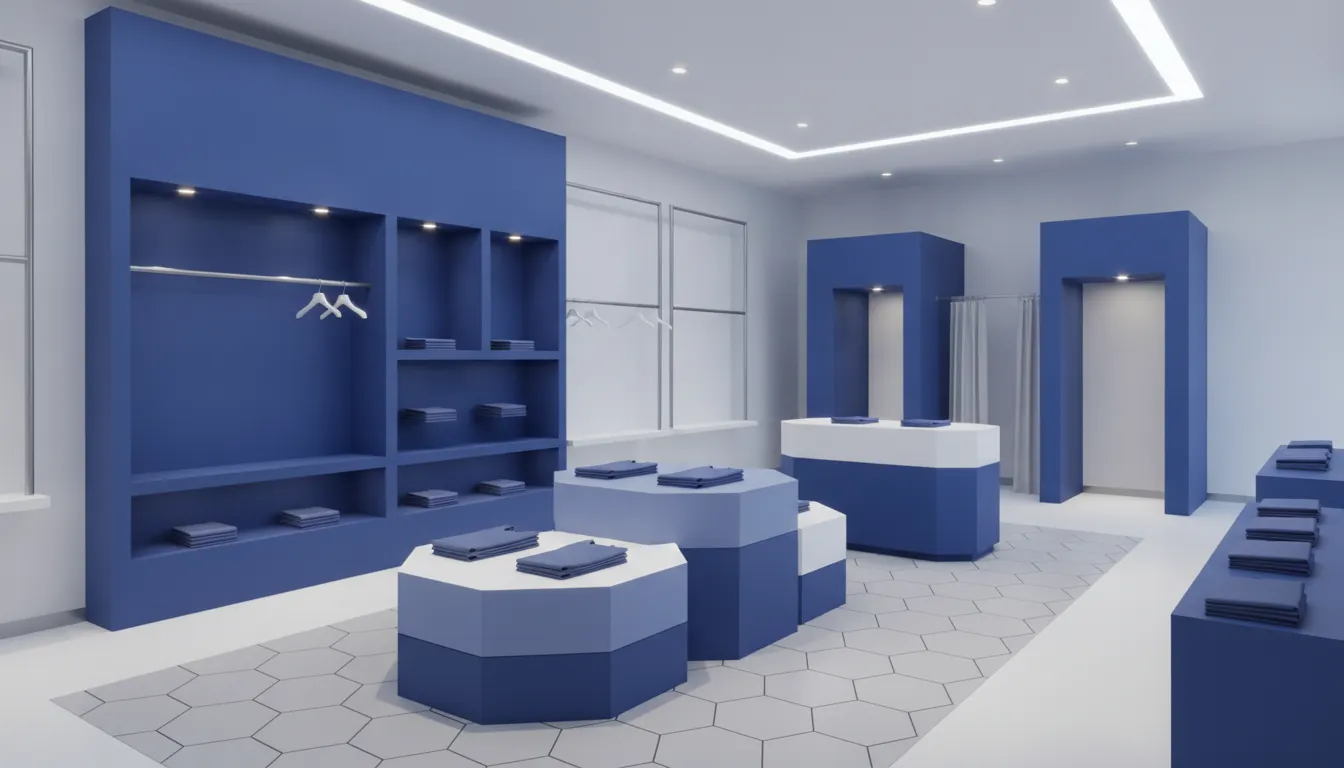


An apparel store succeeds when fixtures do more than hold garments. They should make product easy to browse, preserve comfortable circulation, support replenishment, and place fitting rooms where the path from discovery to trial feels natural. That balance becomes more demanding when the same concept must work across new stores, remodels, and regional variations.
Plan a scalable custom retail fixture program with S-CUBE Fixtures.
The best apparel store fixtures are planned as a coordinated system of racks, wall displays, shelving, specialty merchandising, fitting-room support, and checkout elements. Start with customer and employee movement, then define merchandise capacity, sightlines, materials, finishes, flexibility, and installation requirements before selecting individual components.
A useful plan also accounts for prototypes, documented standards, quality checks, and store-by-store delivery so the fixture package remains practical beyond the first location. The next step is to connect each fixture decision to the larger system that makes the store easier to shop, operate, and repeat.
A rack can display a garment, but a fixture system has to support the way an entire store sells, replenishes, and evolves its assortment. That means planning apparel racks alongside perimeter wall systems, shelving, specialty displays, accessory merchandising, point-of-purchase elements, and the spaces that connect them. The goal is not to select isolated products. It is to create a coordinated environment in which product presentation, customer movement, employee workflow, and brand expression reinforce one another.
This broader view matters because apparel merchandising rarely depends on one fixture type. A collection may need hanging capacity, folded presentation, footwear displays, eyewear or hat merchandising, mannequins, and feature areas for seasonal stories. S-CUBE notes that custom programs can combine wood, metal, acrylic, glass, wire, plastic, and mixed media. Selecting those materials as part of one documented system helps teams align finishes, dimensions, attachment methods, and maintenance expectations instead of solving each zone independently.
System planning also gives operations a voice early in the design process. Fixture engineering should account for both customer flow and employee workflow. Replenishment access, sightlines, back-of-house movement, fitting-room adjacency, and checkout activity can influence where fixtures belong and how much capacity each zone can handle. A visually strong display that blocks a service path or makes replenishment awkward is not a successful store solution.
Start with a zoning and placement framework, then map fixture roles to each zone. This retail store layout planning approach clarifies which elements create a first impression, which carry core inventory, and which support discovery or conversion. From there, teams can define standards for dimensions, finishes, hardware, assembly, and approved variations.
A system can also be repeatable without being rigid. Modular apparel fixtures may support seasonal displays, pilot stores, short-run programs, and faster merchandise turnover, while custom elements establish the distinctive parts of the brand experience. That combination gives store planning and procurement teams a controlled foundation for future locations, remodels, and assortment changes. Instead of reinterpreting the brand at every site, they can work from tested specifications and make intentional adaptations when the store footprint or merchandising strategy requires them.
Plan the layout as a sequence of decisions rather than a collection of attractive displays. Start with a comfortable entry zone that gives shoppers a moment to orient themselves. Avoid placing the most important product or messaging directly at the threshold, where it can be overlooked. Then use the first clear sightline, often along the right side of the entrance, to communicate the current collection, seasonal story, or brand point of view.
From there, establish a readable perimeter path. Wall fixtures can carry core categories while floor fixtures create collection moments without turning the sales floor into an obstacle course. Keep transitions between departments visually obvious, and maintain sightlines toward new arrivals, fitting rooms, service points, and checkout. A shopper should be able to understand where to go next without relying on excessive signs.
Use fixture density to support the merchandise, not simply to maximize hanging capacity. Give customers enough room to pause, browse, compare sizes, and move around another shopper. Place complementary items where the path naturally slows, such as accessories near a relevant apparel collection. Modular retail fixture design principles can help teams adjust these zones as seasonal assortments and traffic patterns change.
Fitting rooms should be easy to find from the main circulation path, but they should not interrupt the strongest product presentation. Position nearby recovery space and replenishment access so employees can support the area without crossing the primary shopper route. Checkout should remain visible enough to reassure shoppers, while its queue and cash-wrap footprint do not constrict the exit or create a bottleneck.
Build replenishment into the plan from the beginning. Consider where cartons, rolling racks, and recovered merchandise will move during open hours, and protect key sightlines from back-of-house activity. Accessibility also needs to be addressed during planning. The 2010 ADA Standards establish minimum requirements for accessible commercial facilities, but they are not a substitute for project-specific review or legal advice. Confirm that routes, maneuvering areas, fixtures, fitting rooms, and checkout conditions are reviewed against the requirements that apply to the store and jurisdiction.
The result should be a flow map that connects entry, perimeter, collections, fitting rooms, and checkout while preserving workable employee routes. Test it in a plan and, when possible, in a prototype before standardizing the apparel store fixtures for multiple locations.
A complete fixture plan assigns each element a job in the customer journey. The goal is not to fill the sales floor with every available rack style. It is to create a coordinated system that presents merchandise, protects clear circulation, supports replenishment, and gives employees practical places to work. S-CUBE describes apparel programs that combine racks and specialty displays with perimeter wall systems, shelving, POP displays, and boutique or high-volume solutions.
| Fixture role | Primary job | Planning question |
|---|---|---|
| Wall systems | Use vertical space for folded goods, hanging presentations, brand stories, and flexible merchandising. | Which products need strong sightlines, adjustable positions, or a consistent perimeter standard across stores? |
| Garment presentation | Organize core assortments, featured looks, and capacity by category, size, color, or collection. | Should the presentation prioritize browsing ease, outfit building, product density, or a controlled combination? |
| Tables | Give shoppers an approachable surface for folded merchandise, seasonal stories, and outfit groupings. | Where can tables create a focal moment without narrowing primary paths or obstructing sightlines? |
| Shelving and accessory displays | Support shoes, bags, eyewear, caps, hats, and other add-on categories near relevant apparel. | Which complementary products should be adjacent to encourage complete-look discovery and efficient replenishment? |
| Fitting-room adjacency | Connect try-on activity with nearby product support, returns handling, and employee visibility. | Can shoppers reach fitting rooms intuitively while staff can replenish, assist, and manage rejected garments? |
| Checkout support | Provide a functional cash-wrap zone for transactions, impulse items, service tasks, and secure storage. | How will the counter support employee workflow while remaining aligned with the store's brand and final sightline? |
These roles should be resolved together, not in separate purchasing exercises. Wall systems and garment fixtures establish capacity and visual rhythm. Tables create campaign flexibility. Shelving and accessory displays connect categories. Fitting-room and checkout decisions then determine how comfortably customers and employees move through the plan. S-CUBE notes that fixture engineering considers both employee workflow and customer flow, which is why a retail store layout planning process should test the relationships between zones before specifications are finalized.
Material selection can reinforce the system without making every component identical. Custom programs may combine wood, metal, acrylic, glass, wire, plastic, and mixed media according to the product, environment, and brand requirements. The practical test is whether each fixture role supports the merchandise strategy, daily operations, and future store standards.
Talk with S-CUBE about apparel store fixtures built for pilot testing and repeatable rollout.
Fitting rooms and checkout should be planned as connected operational zones, not treated as leftover space after the sales floor is filled. Their location affects how shoppers move with selected garments, how associates monitor activity, and how quickly merchandise returns to the floor. A strong apparel fixture plan maps the path from display to fitting room, from fitting room to decision point, and from decision point to checkout. The goal is to avoid backtracking and visual congestion.
Place fitting rooms close enough to apparel departments that shoppers can carry selections naturally, while maintaining clear sightlines and a comfortable transition from browsing to trying on. The surrounding zone may need mirrors, seating, hooks, return points, and a controlled place for garments that customers do not keep. Seating supports companions and shoppers who are comparing items, while mirrors should be positioned to serve the fitting-room experience without obstructing circulation.
Associate workflow matters just as much. Team members need practical access to returns, replenishment, and customer assistance without crossing the primary path repeatedly. Storage or concealed back-stock near the zone can help manage try-on returns, but it should not become an improvised accumulation point. Accessibility must also be considered during design and alteration work. The 2010 ADA Standards establish minimum requirements for accessible commercial facilities.
Checkout should accommodate queue formation, transaction work, impulse merchandise, bagging, and short-term storage without making the entrance or sales floor feel blocked. Define where the line begins, how it changes during peak periods, and how customers exit after purchase. Cash-wrap storage should support the associate's workflow, with supplies and merchandise positioned for access but kept visually controlled.
The cash wrap is also one of the clearest brand expressions in the store. Materials, finishes, lighting, signage integration, and detailing should relate to the broader fixture family rather than appear as a separate counter. S-CUBE notes that custom cash wraps are designed for productivity and brand alignment, while fixture engineering considers both employee workflow and customer flow. For a broader framework, review these retail fixture design principles alongside the fitting-room and checkout plan.
A scalable fixture standard turns a successful store concept into a repeatable operating system. It should tell planners, manufacturers, installers, and store teams exactly what to build, where it belongs, and how it can be adapted without losing the intended customer experience.
Start with an approved library of fixture families. For apparel store fixtures, that may include wall bays, perimeter systems, two-way or four-way racks. Nesting tables, folded-merchandise shelving, cash wraps, shoe displays, eyewear or hat displays, mannequins, and accessory units. Each family should have a defined purpose, approved sizes, connection details, load expectations, and compatible accessories. This prevents every location from solving the same merchandising problem in a different way.
The standard should document dimensions and clearances for customer circulation, employee replenishment, doors, fitting-room approaches, emergency routes, and service access. Accessibility requirements also need to be considered during layout and detailing. The 2010 ADA Standards establish minimum requirements for accessible commercial facilities, so accessibility review belongs in the design process rather than at the end of installation.
A finish schedule should identify approved substrates and combinations, such as wood, metal, acrylic, glass, wire, plastic, or mixed media. It should define colors, sheen, edge treatments, protective coatings, and acceptable tolerances. Hardware specifications should cover fasteners, brackets, leveling components, locks, hangers, shelf supports, and replacement parts. Accessories should be listed by fixture family so visual merchandising teams know what can be added without drilling, improvising, or compromising stability.
Modular systems are particularly useful when stores need seasonal changes, pilot layouts, short runs, or faster merchandise turnover. Modularity is most valuable when the connection points, interchangeable parts, and approved configurations are documented in the standard, not left to individual installers.
Quality checkpoints should cover raw materials, in-process construction, final assembly, dimensions, finishes, and packaging before shipment. Revision control is equally important. Assign a version to every drawing, finish schedule, hardware kit, and installation guide. Record who approved each change and which stores it affects.
S-CUBE supports design, engineering, and prototyping services that can help validate these details before production. A controlled standard gives procurement and operations a common reference while leaving room for local adaptations that are intentional, documented, and easy to reproduce.
A prototype is the point where a fixture standard becomes testable in a real store environment. Renderings and CAD can confirm overall intent, but a physical review exposes practical issues before they affect every location: awkward reach zones. Unstable accessory placement, difficult replenishment, unclear assembly steps, or finishes that do not work with the surrounding merchandise.
Manufacturing and logistics should be planned as one release schedule, not as separate handoffs after the fixture design is finished. Start by matching the production model to the program. A custom domestic or international run may make sense when the store concept requires specific dimensions, finishes, materials, or branded details. Retail-ready components can shorten the path for immediate needs, while a hybrid program can combine standard modular elements with custom focal displays. The right choice depends on scope, store count, required customization, replenishment needs, and the rollout date.
Timing should remain conditional on approved inputs. S-CUBE reports a typical six- to ten-week lead time for custom programs after design approval. That window should be treated as a planning reference, not a promise independent of scope. Final quantities, drawings, materials, finishes, revisions, and shipping requirements all need to be resolved before the production clock is meaningful.
Packaging a fixture for a scalable rollout means protecting the unit while making store-level receiving and installation straightforward. Define whether each item ships assembled, partially assembled, or in a knock-down configuration. Build pack-outs around the store plan so hardware, instructions, replacement parts, and fixture components arrive together. Label cartons by store, zone, fixture family, and revision so field teams can identify the correct package quickly.
Coordinate shipment releases with construction and installation dates rather than sending every location's inventory at once. S-CUBE supports warehousing, kitting, staging, direct-to-store shipping, and scheduled releases for phased programs. A distribution plan should include exception handling for damaged cartons, missing components, changed store dates, and field conditions that require a documented adjustment. Review S-CUBE's logistics, transportation, and distribution services when mapping that handoff.
Quality control should verify materials, dimensions, finishes, assembly, hardware, packaging, and documentation before a shipment is released. For a program with many locations, consistent inspection records make it easier to identify whether an issue is isolated or systemic. They also give store and procurement teams a reference when replacements or fill-in units are needed later.
When production includes domestic and international partners, define the same acceptance criteria across the program. S-CUBE describes factory-level, assembly, pre-shipment, and final inspection points supported by US and China-based quality teams. Those checks should be connected to the approved drawings and finish samples, not evaluated against memory or an informal photo.
Consistency starts with treating the fixture program as a controlled system rather than a collection of products. Create one approved fixture library. Identify each rack, wall unit, display table, cash wrap, accessory fixture, and fitting-room component by SKU, dimensions, materials, finish, assembly method, and intended use. Then connect the library to store-specific plans that show quantities, placements, exceptions, and installation notes.
Define who approves a design change, a finish substitution, a quantity adjustment, a packaging change, or a field modification. Visual merchandising may own the customer-facing presentation, store planning may own the footprint, procurement may own commercial approvals, and operations may own replenishment requirements. The exact ownership model can vary, but it should be explicit before production begins.
Use revision numbers and a shared change log. Record the reason for the change, the locations affected, the approved replacement specification, and the date it becomes active. This prevents a local workaround from quietly becoming the new standard or an outdated drawing from returning in a later store wave.
Installation guides, carton labels, assembly instructions, and store acceptance checklists should all reference the same fixture names and revision numbers. Capture field questions during the pilot, resolve them centrally, and update the standard before the next wave. Store teams should have a clear path for reporting damage, missing components, fit issues, or merchandising concerns.
Inventory visibility supports consistency after installation. Track fixture components, replacements, and store-specific quantities so future openings and refreshes do not require a new sourcing exercise. S-CUBE provides inventory control and warehouse management services for programs that need staged releases, fill-ins, or ongoing support.
The final coordination step is a shared release checklist. Confirm what was approved, what is packed, where it is going, and when the installation team is scheduled to begin.
Use a staged process to keep design decisions connected to rollout realities. Each stage should produce an approval record that the next team can use.
Plan the next apparel store fixture rollout with S-CUBE Fixtures.
A complete apparel program may include garment racks, perimeter wall systems, shelving, display tables, mannequins, fitting-room support, checkout fixtures, and accessory displays for shoes, eyewear, caps, or hats. The right mix depends on the merchandise plan, available floor area, replenishment method, and the movement you want shoppers and employees to make through the store.
Requirements should cover the store format, product categories, capacity, dimensions, clearances, materials, finishes, hardware, accessories, assembly, packaging, quality checks, installation, and future replacement needs. Include both customer circulation and employee workflow before approving the fixture standard.
Retail-ready fixtures can suit pilots, short-run programs, or stores that need an immediate modular solution. Custom fixtures are useful when the brand needs a specific environment, coordinated materials, unique dimensions, or a repeatable program across many locations. Some programs combine both approaches.
Review a functional prototype with store planning, visual merchandising, operations, procurement, and installation stakeholders. Test customer flow, product access, replenishment, assembly, packaging, finish quality, and store-specific delivery requirements before releasing production.
For a coordinated apparel store environment, contact S-CUBE Fixtures to discuss a custom retail fixture program that fits your store format, timeline, and rollout goals.
Subscribe for expert insights on fixture design, materials, and modern retail environments.