The retail world moves fast, and staying relevant means constantly evolving the in-store experience. Rapid prototyping is a key tool for this evolution, allowing brands to test new ideas for store layouts, displays, and customer interactions without the risk of a full-scale investment. It’s about being able to pivot quickly and confidently, ensuring your physical space keeps up with your customers' expectations. By turning concepts into tangible models, retailers can refine their vision and create environments that truly connect with shoppers. This process dramatically improves communication and ensures everyone from your design team to your marketing department is aligned on the final vision.
Before you commit to a full-scale production run of a new retail display or fixture, you need to know if the design actually works. Will it hold your products correctly? Does it fit the aesthetic of your store? This is where rapid prototyping comes in. It’s a game-changer for turning a great idea into a tangible, tested product without the high stakes of mass manufacturing. It allows you to see, touch, and test your concepts in the real world, ensuring the final product is exactly what you envisioned.
So, what exactly is it? At its core, rapid prototyping is a collection of techniques used to quickly fabricate a physical model or part from a 3D computer-aided design (CAD) file. Think of it as a dress rehearsal for your product. The main goal is speed—creating a tangible model you can hold, test, and evaluate in a fraction of the time it would take with traditional methods. This allows your design and engineering teams to spot flaws, test ergonomics, and validate the overall concept before you invest heavily in tooling and production. It’s all about making smarter decisions, faster.
Rapid prototyping isn’t just a single step; it’s a crucial part of an iterative design cycle. It bridges the gap between a digital concept and a physical product, allowing your team to test and refine designs in a practical way. Instead of discovering a critical design flaw during the first production run (a costly mistake), you can catch it early. By creating multiple versions of a prototype, you can address technical challenges and improve functionality throughout the development process. This hands-on approach gives you a much clearer understanding of how your final product will look, feel, and perform long before it hits the factory floor, ensuring the final result meets your exact specifications.
So, why should you make rapid prototyping a non-negotiable part of your process? Think of it as a strategic shortcut. Instead of moving from a digital design straight to mass production—a move filled with risks and unknowns—prototyping gives you a crucial checkpoint. It’s your chance to hold a physical version of your idea, test its functionality, and see how it feels in a real-world setting before you commit to a full production run. This step is especially important when you’re developing custom retail fixtures or displays that will be rolled out across dozens or even hundreds of locations.
Bringing a tangible model to the table changes the conversation. It allows your team, stakeholders, and even customers to interact with the design in a way that a 2D drawing or 3D render simply can’t match. You can identify design flaws, confirm material choices, and refine the user experience early on. Ultimately, rapid prototyping helps you move forward with confidence, knowing that your final product is not only well-designed but also practical, manufacturable, and aligned with your brand’s goals. It’s about making smarter decisions faster, saving money, and creating a better end product.
One of the most significant advantages of rapid prototyping is how it accelerates your entire project timeline. Instead of waiting weeks or months for a traditional prototype, you can have a functional model in your hands in a matter of days. This speed allows your team to quickly iterate on designs. You can test multiple concepts in the time it would have taken to produce a single traditional model. For a retail rollout with tight deadlines, this is a game-changer. Faster iteration means faster problem-solving, leading to quicker approvals and a shorter path to final production. This process helps get your new fixtures into stores on schedule, without compromising on design quality.
Committing to thousands of units of a new store fixture without testing a physical model is a huge financial risk. Rapid prototyping allows you to validate your concept without the massive upfront investment in tooling and materials required for mass production. Creating a prototype is a low-cost way to confirm that the design is structurally sound, the materials are appropriate, and the fixture functions as intended. If you discover a flaw or an opportunity for improvement, you can make changes to the digital file and produce a new version quickly and affordably. This design, engineering, and prototyping phase is your financial safety net, preventing costly mistakes before they impact your bottom line.
A 3D render on a screen is one thing; a physical object you can touch and interact with is another. Prototypes allow you to gather meaningful, real-world feedback from key stakeholders—whether it’s your marketing team, store managers, or a customer focus group. People can see how a display presents merchandise, test its durability, and assess its overall impact within a retail environment. This hands-on feedback is invaluable for refining the design. Catching a potential issue, like a shelf that’s too high or a sign holder that’s easily knocked over, during the prototype stage saves you from making expensive changes after production has already started.
A design that looks perfect on paper might present unexpected challenges during production. Rapid prototyping acts as a bridge between your design and the final manufacturing process, helping to identify potential issues early. By creating a physical model, you can test assembly methods, check for tight tolerances, and ensure all components fit together correctly. This step provides critical insights that inform the final domestic and international manufacturing strategy. It helps your production partners anticipate challenges and refine their processes, leading to a smoother, more efficient production run with fewer errors and delays. This proactive approach ensures your fixtures are not only well-designed but also built for seamless, large-scale production.
Once you have a digital design, it’s time to bring it into the physical world. There are several rapid prototyping methods available, and the best choice depends entirely on your project’s goals, budget, and timeline. Are you in the early stages, simply testing a concept's shape and size? Or do you need a fully functional model that looks and feels exactly like the final product you'd see in a store? Understanding the core differences between these techniques is crucial for making an informed decision that saves you time and money down the line.
Choosing the right path isn't just a technical decision; it's a strategic one. A simple 3D print might be perfect for quick, iterative feedback, while a more robust CNC-machined part might be necessary for testing the durability of a new display hook. The material, finish, strength, and speed of production all play a role. Getting this step right helps you avoid costly mistakes before committing to large-scale manufacturing. At S-CUBE, our design and engineering process is built to guide you through these choices, ensuring your fixtures are developed efficiently and effectively. Let's walk through some of the most common approaches used to create prototypes for retail displays and fixtures.
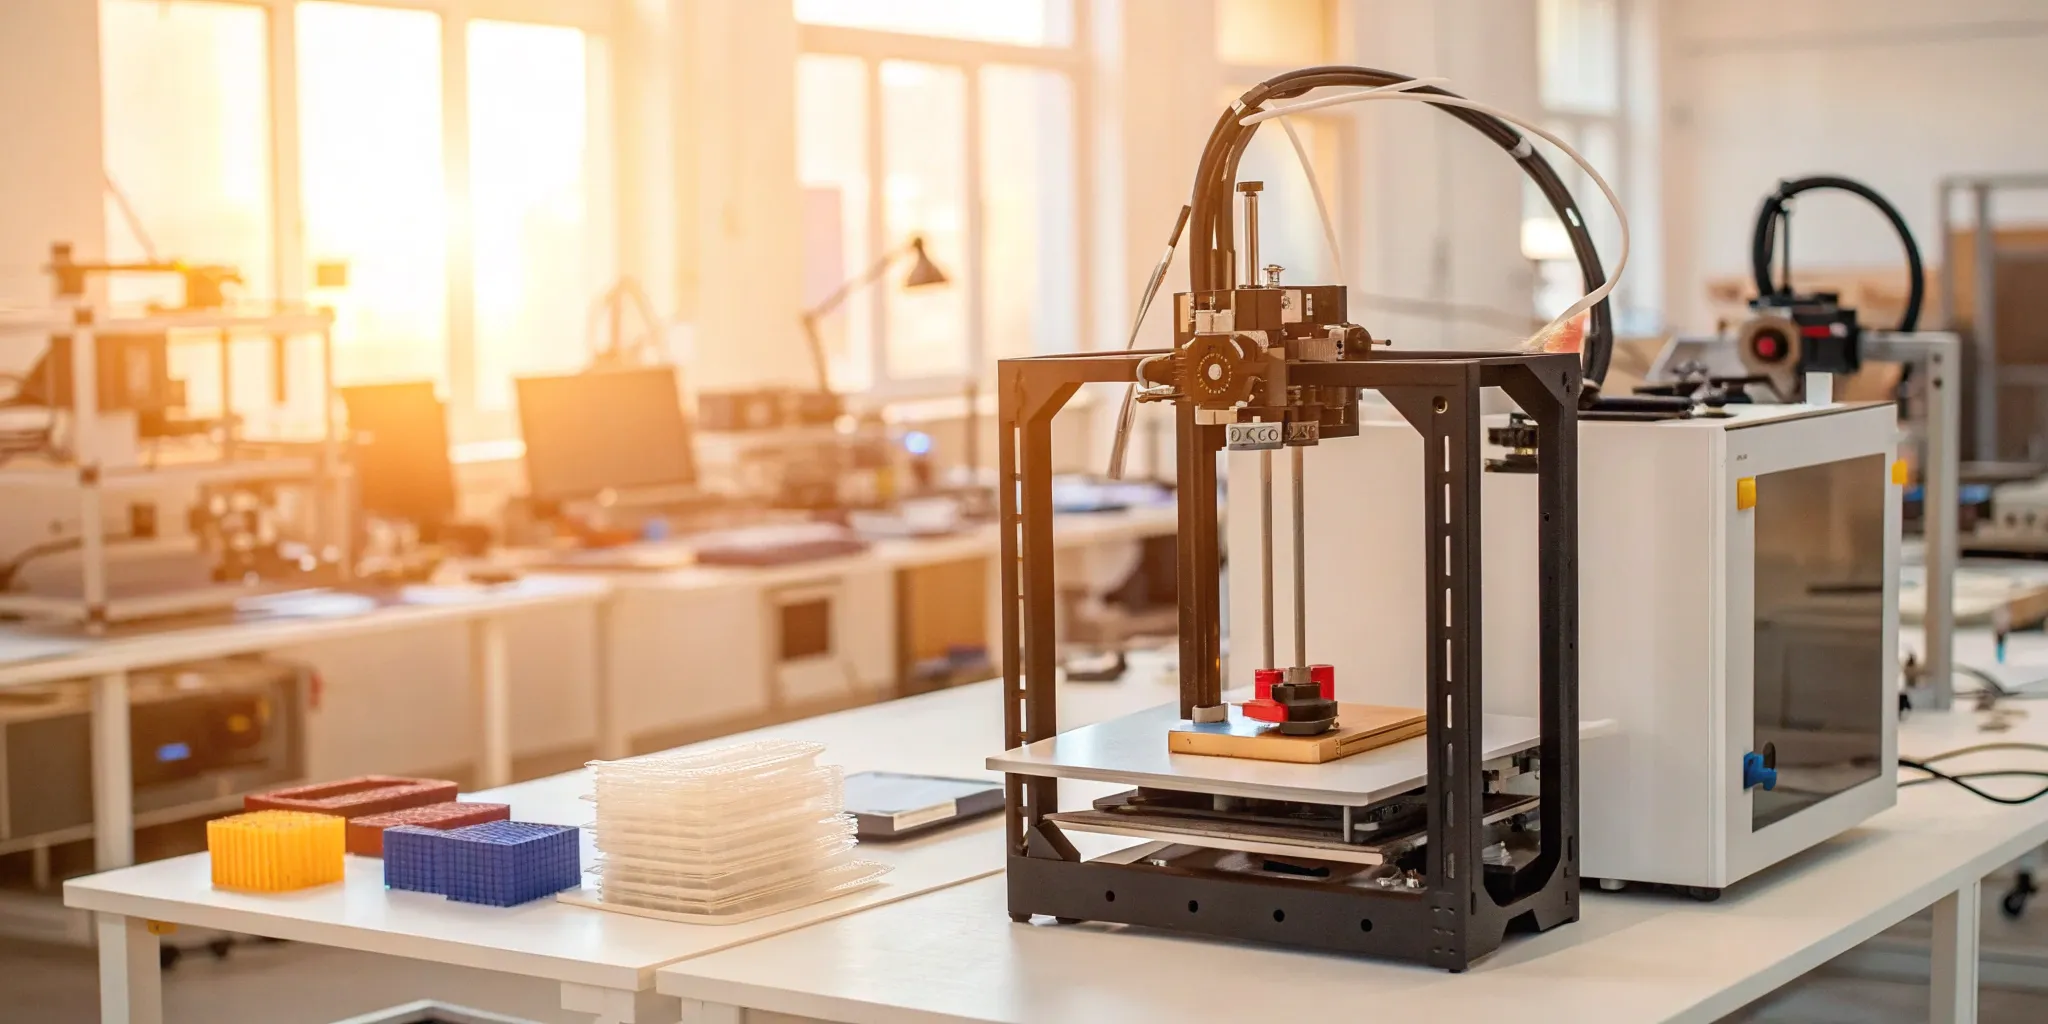
Think of 3D printing as building something from the ground up, layer by tiny layer. This technique, also known as additive manufacturing, is incredibly versatile. Because it doesn't require special tooling, it’s perfect for creating complex or intricate shapes quickly. It’s a popular first step in the prototyping process because it allows designers to produce a physical model fast, making it easy to check for fit and form. Modern 3D printing can use a variety of materials that mimic the properties of final production plastics, giving you a realistic feel for the end product without the high initial cost.
If 3D printing is like building with blocks, CNC (Computer Numerical Control) machining is like sculpting from a solid block. This is a subtractive process, where a computer-controlled machine carefully cuts, drills, and carves away material to reveal the final design. CNC machining is known for its precision and ability to create very strong parts with smooth surface finishes from production-grade plastics and metals. When you need a prototype that can withstand physical stress testing or requires tight tolerances, CNC machining is often the best method to ensure durability and accuracy for your retail fixtures.
Injection molding is the go-to method for mass production, but it can also be used for creating high-fidelity prototypes. This process involves injecting molten material into a custom mold, resulting in strong, consistent parts with an excellent surface finish. While creating the initial mold can be more time-consuming and costly, it’s a great option when you need a small batch of prototypes that are nearly identical to the final product. It’s often used later in the development cycle, after initial designs have been validated with faster methods like 3D printing, to test with engineering-grade plastics before committing to full-scale manufacturing.
Vacuum casting is a fantastic middle-ground for creating small batches of high-quality prototypes. The process starts by making a master model, often with 3D printing or CNC machining. A silicone mold is then created around this master. Once the mold is ready, a liquid polymer is poured in under a vacuum to remove air bubbles, ensuring a flawless copy. This method is ideal for producing parts that closely resemble the final product in texture, color, and feel. It’s perfect for creating marketing samples, conducting user testing, or validating a design before investing in expensive production tooling.
Think of rapid prototyping not as a single event, but as a cycle. It’s a structured, repeatable process designed to turn a great idea into a tangible product you can hold, test, and perfect. The whole point is to move quickly, learn from physical models, and make adjustments before you commit to a full production run. This approach saves you from discovering a critical design flaw after you’ve already invested thousands in manufacturing. For retailers rolling out new fixtures across multiple locations, getting it right the first time is essential. This five-step loop is how you ensure your final design is functional, cost-effective, and ready for the sales floor. By following this framework, you can test your concepts, gather real-world feedback, and refine your vision with confidence.
Every great prototype starts as a digital blueprint. Before any material is cut or printed, your idea needs to be translated into a 3D computer-aided design (CAD) file. This is the foundational step where your vision takes a specific, measurable shape. This digital model contains all the data needed to create a physical part, from its exact dimensions to its surface textures. A detailed and accurate design is crucial, as it serves as the instruction manual for the manufacturing equipment. Working with an experienced team on design and engineering ensures your digital file is optimized for production, preventing issues down the line and setting your project up for success.
Choosing the right material is one of the most critical decisions in the prototyping process. Your choice will influence the prototype's functionality, appearance, and cost. You don't always need to use the final production material; sometimes, a less expensive alternative can work just fine for testing the form and fit of a design. However, if you need to test for strength or durability, you’ll want a material that closely mimics the final product. For a retail display, this could mean deciding between different woods, metals, or plastics to see how they hold up and match your store's aesthetic. This decision directly impacts machining time, cost, and the quality of feedback you'll receive.
This is where your digital design comes to life. Using the CAD file as a guide, fabrication can begin. Depending on the material and complexity of your design, this might involve 3D printing, CNC machining, or another manufacturing method. The goal of this stage is speed. Rapid prototyping allows your team to get a physical model in their hands quickly, so you can start identifying any technical issues or design challenges that weren't apparent on a screen. This quick turnaround from digital to physical is what makes it possible to test and refine designs efficiently, keeping your project on schedule and within budget.
Once the prototype is built, it’s time to put it to the test. This is your first chance to see how the design works in the real world. For a retail fixture, this could involve checking its stability, seeing how easily it can be assembled, or loading it with products to assess its capacity and presentation. This hands-on evaluation helps you find and fix design problems early, avoiding expensive changes later in the production process. Gather feedback from everyone involved—engineers, designers, marketers, and even store associates who will interact with the final product. Their insights are invaluable for making meaningful improvements.
Prototyping is rarely a one-and-done deal. The final step is to take all the feedback from your testing and use it to refine the original digital design. This cycle of improving and testing is what makes the process so effective. You might adjust a dimension, change a material, or simplify an assembly process based on what you learned. Then, a new prototype is fabricated, and the testing process begins again. This iterative loop continues until the prototype meets all your requirements and you’re confident in the design. A dedicated project management team can help guide this process, ensuring each iteration moves you closer to a perfect final product.
With several prototyping methods available, picking the right one for your retail fixture project can feel like a major decision—because it is. The method you choose influences everything from your timeline and budget to the quality of feedback you receive. Think of it less as a technical choice and more as a strategic one. The goal is to select a process that gives you the most valuable information at the right stage of development, ensuring your final fixtures are effective, durable, and ready for a multi-store rollout.
Your choice will depend on what you need to learn. Are you testing the visual appeal of a point-of-purchase display? Or do you need to confirm the structural integrity of a new shelving unit? Answering these questions will help you find the perfect fit.
Before you can select a method, you need to define your project's core requirements. Selecting the right material is often the first and most critical step, as it sets the foundation for the entire process. An overly intricate design can lead to longer production times and higher costs, so it’s important to balance your creative vision with practical constraints. To narrow down your options, consider the purpose of your prototype. Is it a simple visual model to show stakeholders, or a functional unit for real-world testing? The level of detail, required durability, and the specific materials you plan to use for the final product will all guide your decision toward the most effective design and prototyping approach.
Every prototyping method involves a trade-off between speed, cost, and accuracy. Understanding how to balance these three elements is key to managing your project effectively. For example, 3D printing allows teams to quickly produce multiple iterations of a design, making it ideal for early-stage validation where speed is more important than perfect accuracy. On the other hand, CNC machining might take longer and cost more, but it delivers a high-fidelity prototype that closely mimics the final product's strength and finish. The right balance depends on your goals. If you need to quickly test and refine a concept, a faster, less expensive method is best. If you're preparing for manufacturing, investing in a more accurate prototype can save you from costly errors down the line.
The materials you choose for your prototype should directly support your project goals. Different industries require tailored approaches, and retail is no exception. Your fixtures need to be durable enough for a high-traffic environment while matching your brand’s aesthetic. Rapid prototyping uses various manufacturing processes like 3D printing, CNC machining, and injection molding, each compatible with different materials. If your final display will be made of metal and wood, creating a prototype from those same materials will give you the most accurate feedback on its look, feel, and durability. This alignment ensures that the insights you gain from testing are directly applicable to the final production run, reducing risks and ensuring a successful rollout.
Rapid prototyping can feel like a superpower, letting you bring ideas to life in days instead of months. It’s an exciting phase where your vision for a new retail fixture or display starts to take shape. But like any powerful tool, it comes with its own set of challenges. The good news is that these hurdles are well-known and entirely manageable with a bit of foresight. Knowing what to expect can help you sidestep common pitfalls, keep your project on track, and ensure your investment yields the best possible results.
For national retailers planning a multi-store rollout, the stakes are even higher. A small oversight in the prototype stage doesn't just affect one fixture; it can be multiplied across hundreds of locations, leading to budget overruns, installation nightmares, and a compromised brand experience. This is why treating the prototyping phase with strategic rigor is so important. The goal isn't just to create a model—it's to pressure-test your design, validate your materials, and confirm that your fixture will perform flawlessly in the real world. By anticipating challenges related to cost, technical specs, and workflow, you shift from a reactive position to a proactive one. This approach turns potential problems into opportunities for refinement, ensuring your final fixtures are durable, effective, and perfectly aligned with your vision.
Let’s be direct: developing prototypes can be a costly endeavor, especially when you need high-fidelity models that look and feel like the final product. Budget overruns can happen when a design requires more iterations than expected or when material costs are higher than anticipated. The goal is to get valuable feedback without breaking the bank.
To prepare, start by defining a clear budget and communicating it to your design partner. A great partner will help you create a prototyping strategy that aligns with your financial plan, perhaps by starting with less expensive, low-fidelity models to validate the core concept before moving on to more detailed versions. This phased approach allows you to make critical decisions early, saving you from investing heavily in a design that isn't quite right. A clear understanding of the design, engineering, and prototyping process helps keep costs transparent and predictable.
While rapid prototyping gives you incredible insight into a design’s form and function, it’s important to remember that a prototype is not the final product. The materials and methods used might not have the same precision or strength as those used in full-scale production. For example, a 3D-printed version of a display bracket will show you its exact size and shape, but it won’t be able to support the same weight as the final steel version.
The best way to handle this is to be crystal clear about the purpose of each prototype. Is it for a visual check with your marketing team? Or does it need to undergo functional stress testing? Communicating these goals to your manufacturing partner is crucial. They can guide you toward the right method and help you interpret the results, ensuring you understand what the prototype can—and can’t—tell you about your final fixture.
Prototyping isn’t an isolated step; it’s a critical piece of your overall product development workflow. A common challenge is ensuring a smooth handoff between your design team, the prototyping phase, and final manufacturing. Without a clear process, you can lose valuable time and information, leading to confusion and delays. The goal is to create a seamless flow where feedback from one stage directly informs the next.
To prepare, establish a clear feedback loop from the very beginning. Define who needs to review the prototype, what the approval criteria are, and how feedback will be documented and implemented. This is where working with a partner who offers strong project management and customer service becomes a huge advantage. When one team manages the entire journey from initial sketch to final rollout, you can be confident that nothing will get lost in translation.
The "rapid" in rapid prototyping is its biggest selling point, but speed should never come at the expense of quality. Rushing the process can lead you to overlook critical design flaws that become much more expensive to fix later. At the same time, spending too much time perfecting a prototype can defeat the purpose of moving quickly to get feedback and validate your ideas. The challenge is finding that sweet spot.
The key is to build a realistic timeline that accounts for thoughtful testing and iteration. A prototype gives you a huge advantage by showing you how your fixture will perform early in the cycle, so don’t cut that learning phase short. An experienced partner can help you strike the right balance, recommending the best methods for your timeline while ensuring a complete quality control process. This ensures you get the speed you need without sacrificing the quality your brand deserves.
The retail world moves fast, and staying relevant means constantly evolving the in-store experience. Rapid prototyping is a key tool for this evolution, allowing brands to test new ideas for store layouts, displays, and customer interactions without the risk of a full-scale investment. It’s about being able to pivot quickly and confidently, ensuring your physical space keeps up with your customers' expectations. By turning concepts into tangible models, retailers can refine their vision and create environments that truly connect with shoppers.
To create a memorable shopping trip, you need to understand what your customers want. Rapid prototyping lets you test different approaches to the in-store journey. Imagine creating a few versions of an interactive product display or a new checkout counter layout. You can gather real-world feedback from shoppers and staff before committing to a hundred-store rollout. This iterative process helps you fine-tune every detail, from the flow of foot traffic to the placement of key products. It allows you to develop concepts quickly and efficiently, ensuring your final design is optimized to create a welcoming and personalized experience that encourages customers to return.
Technology is pushing the boundaries of what’s possible in fixture design, and AI is leading the charge. AI-powered rapid prototyping can accelerate the creative process by generating dozens of design options based on your specific needs—like budget, materials, and brand guidelines. This means you can explore more innovative and customized solutions in less time. Instead of starting from a blank slate, your design team can refine AI-generated concepts, focusing their expertise on perfecting the details. This blend of artificial intelligence and human creativity allows for smarter, faster development cycles, helping you bring a unique and highly customized vision to life across all your locations.
More and more, customers are choosing to support brands that prioritize sustainability. Rapid prototyping gives you a low-risk way to incorporate eco-friendly materials into your store fixtures. Curious about a new recycled plastic or a sustainably sourced wood? Instead of placing a massive order, you can create a prototype to test the material’s durability, finish, and overall feel. This hands-on approach lets you verify that a new material meets your quality standards and brand aesthetic before you invest heavily in it. It’s a practical step toward building more sustainable retail environments without compromising on performance or design, showing your customers you’re committed to making a positive impact.
A great idea on paper doesn't always translate perfectly to the sales floor. Rapid prototyping bridges that gap by creating a physical model you can see, touch, and test. This process dramatically improves communication and ensures everyone from your design team to your marketing department is aligned. When you can interact with a prototype of a new point-of-purchase display, you can spot potential issues—like an awkward height or a confusing layout—long before production begins. This feedback loop cuts down on costly mistakes and speeds up your time to market. It’s a critical step in our design, engineering, and prototyping process, ensuring the final fixtures are effective, durable, and ready for a seamless rollout.
Rapid prototyping isn't just for one type of product or industry. Its ability to quickly turn a digital concept into a physical object has made it an essential tool across many fields. From life-saving medical devices to the phone in your pocket, prototyping helps innovators test, refine, and perfect their ideas faster than ever. Let's look at a few key sectors where this technology is making a significant impact.
In the aerospace and automotive industries, there's no room for error. New parts must be rigorously tested for performance and safety, and innovation cycles are incredibly competitive. Rapid prototyping allows engineers to design and test new components quickly, moving from a digital model to a physical part in a fraction of the time it used to take. This speed allows for more iteration and refinement, leading to better, safer, and more efficient vehicles and aircraft. It’s a critical process for everything from creating lightweight brackets to testing the aerodynamics of a new body panel.
When it comes to healthcare, precision can be a matter of life and death. Rapid prototyping plays a vital role in developing custom medical devices, surgical guides, and even anatomical models for pre-surgical planning. This technology allows for the creation of highly accurate and functional prototypes that can be tested and adjusted to meet the specific needs of a patient or procedure. By refining designs through tangible models, medical professionals can ensure better performance and ultimately contribute to improved patient outcomes. It’s a perfect example of how technology helps turn complex medical challenges into practical solutions.
The consumer electronics market moves at lightning speed, with new products and updates launching constantly. To keep up, companies rely on rapid prototyping to accelerate their design process. Using methods like 3D printing, designers can create physical models of new devices, from phone cases to remote controls, almost instantly. This allows them to test the ergonomics, check the fit of internal components, and get a real feel for the product long before committing to expensive manufacturing tools. This flexibility is key to innovating and getting new technology into consumers' hands faster.
In the retail world, responding to consumer trends quickly is essential for success. Rapid prototyping is a game-changer for developing custom retail fixtures and point-of-purchase displays. It allows you to see and interact with a new display design before a full production run, ensuring it meets your exact specifications and brand standards. This process improves communication, increases efficiency, and dramatically shortens the time to market. By creating a prototype, you can test a fixture’s durability, functionality, and visual impact, making sure your final rollout creates the perfect in-store environment. Our design, engineering, and prototyping services help you do just that.
There’s no one-size-fits-all price tag for rapid prototyping. The cost can range from a few hundred dollars for a simple model to thousands for a high-fidelity, functional prototype. Think of it less as an expense and more as an investment in getting your final product right. Spending money upfront to test and refine a design helps you avoid much larger, more expensive manufacturing mistakes down the road.
The final cost depends on a few key variables: the complexity of your design, the materials you choose, and how many versions you need to create. Understanding these factors helps you create a realistic budget that aligns with your project goals. The goal is to use prototyping to gather critical information early, ensuring your full production run goes smoothly.
The cost of a prototype is directly tied to the specifics of your project. One of the biggest drivers is complexity. A simple, low-fidelity model intended only to test a shape or size will naturally cost less than a detailed, functional prototype built to mimic the final product. High-fidelity designs often require more advanced tools and more expensive materials to produce.
Your choice of materials also plays a major role. Prototyping with a standard plastic will be far more affordable than using metals, custom-colored acrylics, or other specialty materials. Finally, consider the number of iterations. Most designs require a few rounds of testing and refinement. Each new version adds to the overall cost, which is why it’s so important to have clear goals for each prototype you create. An experienced partner can help you streamline this process to keep the project on track.
Planning your prototyping budget starts with clear communication and realistic expectations. Before you begin, define exactly what you need to learn from your prototype. Are you testing the fixture’s stability, its visual appeal on the sales floor, or how easily it can be assembled? Answering these questions helps you avoid paying for features you don’t need to test yet. Unclear product requirements can lead to inefficient cycles and budget overruns.
It’s also smart to plan for multiple iterations from the start. It’s rare to get a design perfect on the first try. Building two or three rounds of revisions into your budget allows for a more flexible and effective development process. By gathering more data early on, you’ll have fewer problems to solve later. Ultimately, a well-planned prototyping phase is a powerful tool that helps you accelerate innovation and launch a successful product with confidence.
With a solid understanding of the prototyping process, you’re ready to bring your ideas to life. But turning a digital concept into a physical object that you can hold, test, and show to stakeholders requires more than just hitting 'print.' A successful project hinges on thoughtful planning and having the right team in your corner. Before you jump in, it’s essential to map out your goals and find a partner who can guide you from the initial design to the final iteration. This approach not only saves time and money but also ensures your final product is exactly what you envisioned.
Your prototyping strategy is your roadmap. It defines what you want to learn and how you’ll get there. Instead of creating a model just for the sake of it, a clear plan helps you focus on specific questions. Are you testing the look and feel of a new display? Verifying the fit of a specific component? Or gathering user feedback on functionality? Rapid prototyping allows your team to quickly test and refine designs, addressing technical issues that emerge during development. By defining your objectives upfront, each iteration becomes a valuable step forward, not just a shot in the dark. This clarity is the foundation of an efficient design and engineering process.
Your strategy is only as good as its execution, which is why selecting the right partner is critical. Look for a team that offers more than just manufacturing; you need a partner with deep industry knowledge and robust project management skills. S-CUBE has the industry know-how and manufacturing partnerships to deliver the right custom retail fixtures for you, ensuring your vision is realized correctly the first time. An experienced partner will also help you select the appropriate tools and materials for each stage. They can guide you on when a lower-fidelity model is sufficient for initial feedback versus when you need a high-precision prototype that closely mimics the final product.
How long does it take to get a prototype? The timeline really depends on the complexity of your fixture and the method we use. A simple 3D-printed model to check the shape and size can often be ready in just a few days. A more detailed, functional prototype made with CNC machining from production-grade materials might take a couple of weeks. The goal is always to get a useful model in your hands as quickly as possible so you can keep your project moving forward.
Do I need a finished CAD file to start the process? Not at all. Many of our clients come to us with a concept, a sketch, or just a clear idea of what they need. Our design and engineering team works with you to develop that initial idea into a professional CAD file. The prototyping process is collaborative, so you don't need to have everything perfected before you reach out. We'll help you get there.
What's the real difference between a prototype and the final fixture? Think of a prototype as a dress rehearsal. It’s designed to test specific aspects of your fixture, like its dimensions, assembly, or how it displays products. While a high-fidelity prototype can look and feel very close to the final version, it's not made with the same mass-production tooling. This means it might not have the same long-term durability or exact surface finish as the fixtures that will be rolled out to your stores.
How many prototype versions will I need? It's rare for the first version to be the final one. Most projects go through two or three rounds of prototypes. The first might be a simple model to confirm the basic design, while later versions are used to refine details and test materials. This iterative cycle is a normal and healthy part of the process, as each version gets you closer to a flawless final product that's ready for large-scale production.
Can a prototype be used in a real store for testing? Absolutely, and we often recommend it. Placing a high-fidelity prototype in a store environment is one of the best ways to gather real-world feedback. You can see how customers interact with it and get input from your store associates who will be working with it every day. This step provides invaluable insights that you simply can't get from a boardroom review, ensuring the final fixture performs perfectly where it matters most.
Subscribe for expert insights on fixture design, materials, and modern retail environments.