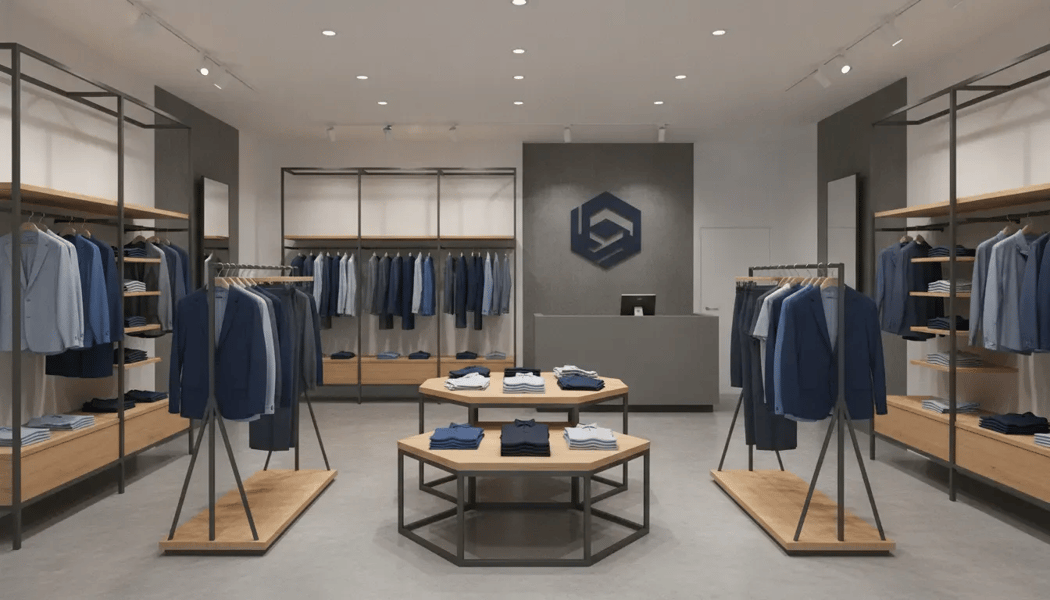


Apparel merchandising has to do more than hold product. Fixtures must present garments clearly, support changing assortments, preserve comfortable circulation, and express the brand across every store format. That makes the planning decision broader than selecting a rack or shelving style.
Custom apparel displays are coordinated fixture programs engineered around a retailer's garments, brand identity, floor plan, capacity needs, and rollout requirements. They may combine racks, shelving, wall systems, accessory merchandising, mannequins, and integrated details using materials such as wood, metal, acrylic, glass, wire, or mixed mediums.
Tell S-CUBE about your custom retail fixture program
The strongest program balances presentation with operational realities: how shoppers move through the department, how teams replenish it, how the assortment changes, and how the design can be repeated at scale. That systems-level view clarifies why apparel fixtures should be evaluated as part of the retail environment, not as isolated hardware.
Apparel merchandising has to do more than hold inventory. It must present garments in a way that makes collections easy to understand, supports daily replenishment, and expresses the retailer's brand across the selling floor. That is why custom apparel displays are best planned as a coordinated fixture program rather than a collection of isolated racks.
A complete program may combine hanging rails for silhouettes and size runs, folded-garment tables, perimeter wall systems, gondolas, counters, shelving, and specialty units for shoes, hats, eyewear, jewelry, or other accessories. Each element has a job. Walls can establish a visual framework, tables can support folded collections or promotional moments, and racks can provide accessible capacity without making the department feel crowded. Counters and accessory displays help connect the primary garment assortment to complete looks.
Customization also goes beyond dimensions. Fixture structure, layout, branding, materials, finishes, storage, and adjustable components can be coordinated around the store format and merchandise strategy. A boutique, department-store apparel area, and high-volume chain may all require different combinations of capacity, presentation, and flexibility. Modular rails, shelves, and accessories can make seasonal changes or format variations easier to manage.
For regional and multi-location retailers, the program must work beyond one floor plan. Design standards, prototypes, manufacturing, logistics, and installation planning help preserve the intended customer experience from a pilot store through a broader rollout. Teams evaluating the full environment can also use this complete retail fixture plan to connect apparel merchandising with the rest of the store.
Apparel fixtures should guide customers through the assortment without making the floor feel crowded. Layout affects visual experience, aisle navigation, time in store, and where shoppers direct their attention, so fixture placement is part of merchandising strategy, not simply a space-planning exercise. Research on retail layouts also shows that rack orientation changes how much of a display enters a shopper's visual field. See this retail display placement strategy guide for broader zoning principles.
Keep the entry zone visually open enough for shoppers to orient themselves. Place a focused outfit, seasonal story, or high-priority collection where it can be seen without creating an immediate bottleneck. From there, use sightlines to lead customers toward adjacent categories, such as tops beside denim or occasionwear near accessories. Custom apparel displays should make the next useful destination apparent, while preserving enough visibility for shoppers and associates to scan the department.
Perimeter wall fixtures can carry folded garments, hanging runs, and backstock while protecting central circulation space. Center fixtures are better used selectively for featured collections, coordinated outfits, or lower-height presentations that preserve views across the store. Orient racks around the way shoppers actually travel, rather than arranging every unit in the same direction. Plan transitions between wall bays, center islands, fitting rooms, and checkout so garments do not project into turning areas or interrupt replenishment routes.
Finally, test the layout with real merchandise and realistic restocking activity. A display that looks efficient when empty may become difficult to shop once hangers, folded stacks, and accessories are in place. The goal is a clear path, strong product visibility, and enough working room for associates to replenish without disrupting customers.
Material selection should connect the fixture to the apparel assortment, store environment, and operating demands. Wood can add warmth and a boutique character, while metal creates a more architectural or industrial expression. Acrylic and glass can support lighter visual presentation, and wire can provide an open merchandising language. Mixed-media construction combines these effects when a program needs both strong brand expression and practical product presentation.
Finishes refine that decision. S-CUBE's capabilities include brand-matched paint colors, wood stains and laminates, chrome, brushed metal, powder coat, specialty textures, and patterns. Powder-coated metal, for example, is one documented framework option for clothing display systems, while the broader design can be customized by size, finish, layout, branding, and fixture structure. The right finish should be evaluated for the store's cleaning routine, expected handling, visual standards, and replacement requirements rather than selected on appearance alone.
Hardware matters just as much as the visible surfaces. Rails, shelves, storage, logo details, and accessory components should work together and be repeatable across the program. That is especially important when custom apparel displays must translate from a concept into multiple store formats. S-CUBE can support material and finish recommendations, 3D renderings, functional prototypes, and value engineering so teams can review the complete fixture before production. This process helps align brand expression with maintenance, merchandising flexibility, and rollout consistency without making unsupported assumptions about performance.
The goal is not to put the maximum number of garments on the floor. It is to give each assortment enough capacity to stay commercially useful while preserving clear sightlines, easy browsing, and a deliberate brand impression. A balanced program typically combines hanging presentation for silhouettes and size runs, folded presentation for depth and color stories. Face-out presentation for priority styles, and smaller accessory zones for shoes, bags, eyewear, or seasonal add-ons.
Start by assigning each fixture a merchandising job. Use higher-capacity rails where replenishment and size availability matter. Reserve face-out arms, feature tables, or mannequins for newness and hero products. Shelves and storage can then support folded goods without forcing every item into the same visual system. Because rails, shelving, storage, and other components can be adjusted, a modular approach can accommodate seasonal changes and different store formats without rebuilding the entire fixture program. See the guide to retail display rack options for a broader comparison of rack applications.
| Approach | Best fit | Planning consideration |
|---|---|---|
| High-density | Core assortments and deep size runs | Prioritize replenishment access and avoid visual crowding. |
| Curated | Newness, premium collections, and hero products | Use more face-out space and stronger breathing room. |
| Modular | Seasonal programs, pilots, and varied store formats | Specify interchangeable rails, shelves, and accessories. |
Most retailers need a deliberate mix rather than one universal density. The right balance depends on assortment depth, replenishment routines, floor area, and the role each zone plays in the customer journey. A custom system should make those decisions visible in the plan, then translate them into repeatable fixture details.
The right accessories help a fixture do more than hold merchandise. They organize the assortment, make products easier to browse, and reduce the amount of rework required from store teams. Examples include adjustable shelves for folded garments, arms and hooks for hanging apparel, baskets for smaller accessories, and shoe shelves that keep footwear coordinated with a collection.
Hat holders, eyewear supports, and dedicated accessory panels can give lower-volume items a defined presentation instead of allowing them to disappear within a larger rack. Mirrors can support try-on decisions, while clear signage helps shoppers understand categories, sizes, or coordinated looks. Integrated lighting may also be appropriate where it improves product visibility or reinforces a focal display. These elements should be selected around the merchandise mix and shopper journey, not added as a standard checklist.
Accessories also affect staff workflow. Adjustable rails, shelving, and storage can make seasonal resets, replenishment, and assortment changes easier. A modular system may allow a retailer to shift between folded and hanging presentation as categories or store formats change. S-CUBE's stated apparel capabilities include options such as shoe racks, cap and hat displays, and accessory merchandising solutions, while the final mix should be confirmed for each program.
For lightweight, adaptable components, review these durable wire retail displays alongside the broader fixture design. The goal is a coordinated system that supports both shopper presentation and daily execution.
Accessibility should be considered while planning the floor, not added after racks and fitting rooms are selected. Start by mapping an accessible route through the department and connecting the entrance, self-service merchandise, fitting rooms, checkout, and other customer-facing elements. The U.S. Department of Justice explains that accessible routes should connect accessible elements and spaces on the same site. And its retail guidance gives a 36-inch unobstructed path example between an accessible entrance and fixed display racks. That example should be treated as cited guidance, not a universal substitute for reviewing the requirements that apply to each store.
For retail layout optimization, test both circulation and reach. Position self-service displays on an accessible route, keep frequently selected garments and accessories within practical reach zones, and avoid placing low-priority merchandise where it narrows a primary path. Distinguish fixed fixtures from movable furniture, since the DOJ guidance treats those categories differently.
Apparel planning must include fitting rooms where provided, not just the sales floor. Massachusetts retail guidance identifies product-offering areas and dressing rooms as spaces that must be accessible, and its retail rules specify a 36-inch minimum clear aisle width. The same guidance addresses accessible counter placement, including a 36-inch counter portion at no more than 36 inches above the finished floor. These are Massachusetts-specific examples, so store teams should confirm applicable local requirements with qualified professionals. A thoughtful fixture program supports inclusive use without claiming certification or providing legal advice.
Consistency starts with a standards package that translates the brand concept into repeatable decisions. Define approved fixture dimensions, materials, finishes, logo treatments, garment presentation rules, signage zones, accessory locations, and installation details. This gives visual merchandising and procurement teams a shared reference instead of relying on interpretation from one store to the next.
Build and review a functional prototype before committing to a broad rollout. A pilot can test sightlines, capacity, employee workflow, replenishment, durability, and installation conditions in a real environment. It also gives the team a disciplined way to separate required elements from approved variations. For example, a smaller store may use a different fixture combination while preserving the same finish palette, merchandising hierarchy, and customer-facing details. S-CUBE supports programs from pilot stores through rollouts spanning more than 500 locations, according to its stated capabilities.
Domestic, international, and hybrid manufacturing models can each support different program priorities, including prototyping, production scale, timing, and cost control. The right choice depends on the approved design, order volume, store schedule, and required level of flexibility. During production, kitting and clear packaging labels can group the right components for each store or department. Coordinated logistics, warehousing, and installation documentation then help field teams receive, identify, and place fixtures correctly.
Quality control should continue beyond the prototype. Raw-material inspection, in-process checks, final assembly verification, pre-shipment audits, and documented approvals create a traceable handoff from factory to store. For complex manufacturing programs, pair those controls with structured project management and customer service so changes are recorded, communicated, and implemented consistently.
Discuss a custom apparel display program with S-CUBE
Start with the garment mix and the way shoppers browse it. A coordinated program may combine hanging rails, folded-garment shelving, wall systems, footwear or accessory displays, mirrors, and storage. The right combination depends on assortment, available floor and wall space, replenishment routines, and the experience the brand wants to create.
Separate core capacity from visual emphasis. Use higher-capacity zones for depth of assortment, then reserve focal areas for featured collections, new arrivals, or complete looks. Adjustable rails, shelves, and storage allow teams to change the mix as categories, seasons, and store formats change without redesigning every fixture.
Material selection should reflect the brand, merchandise weight, cleaning needs, traffic level, and rollout requirements. Wood, metal, acrylic, glass, wire, plastic, and mixed-medium construction can each play a role. Finishes such as laminates, wood tones, powder coat, brushed metal, or brand-matched paint help connect the fixture system to the broader store environment.
Plan clear routes to merchandise, dressing rooms, and service points, and make sure customers can approach and reach key product areas. Requirements vary by jurisdiction and fixture type. For example, U.S. Department of Justice guidance addresses accessible routes to self-service display units and distinguishes fixed building elements from movable furniture: DOJ retail display guidance.
A coordinated display program can help your team align garment presentation, capacity, shopper flow, and brand standards across each store environment. Share your priorities, rollout needs, and merchandising goals with S-CUBE so the next planning conversation starts with the right context. Tell S-CUBE about your custom apparel display program and get started with a focused discussion about your fixture requirements.
Subscribe for expert insights on fixture design, materials, and modern retail environments.